This tutorial will cover the basics on creating new settlements in Fallout 4.
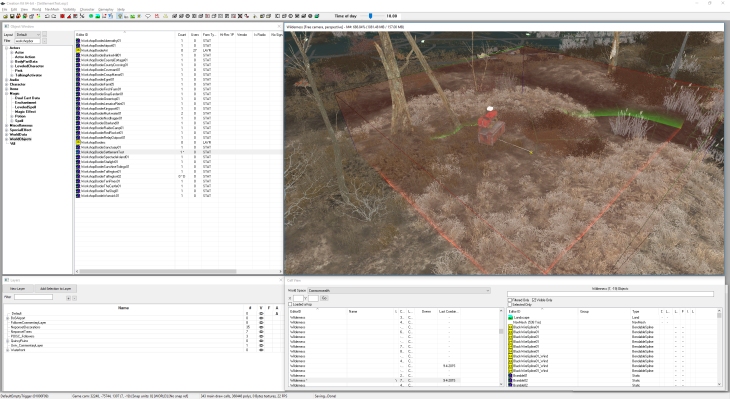
To start with, pick a nice open location that hasn’t been used in the Commonwealth worldspace. I’ve chosen a wilderness cell near to the Atom Cats Garage in the south of the map. I recommend starting small and to finish this tutorial before adding cosmetic objects.
All references to objects such as DefaultEmptyTrigger refer to the placed references in the Render Window. Don’t try and edit the base records for these objects unless it is specified.
Setting up the Settlement
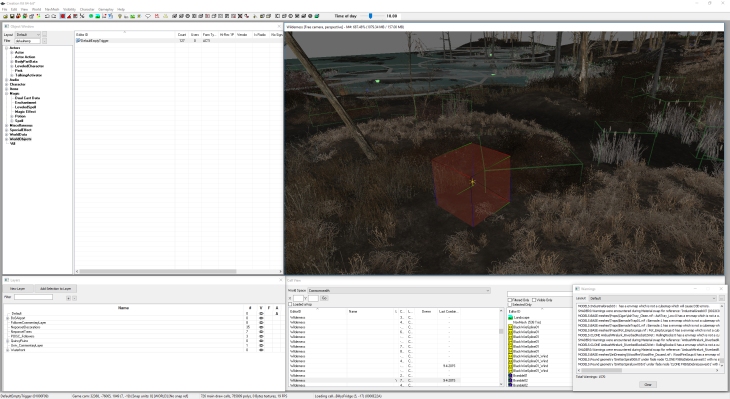
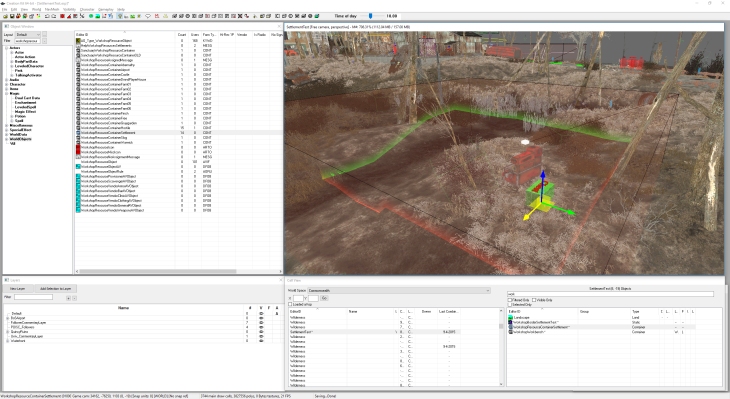
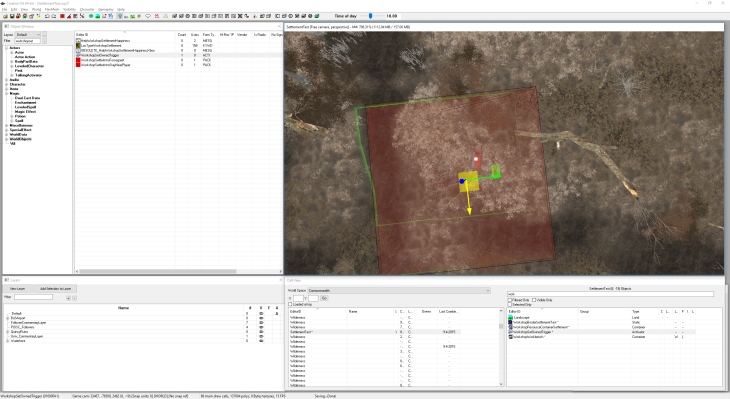
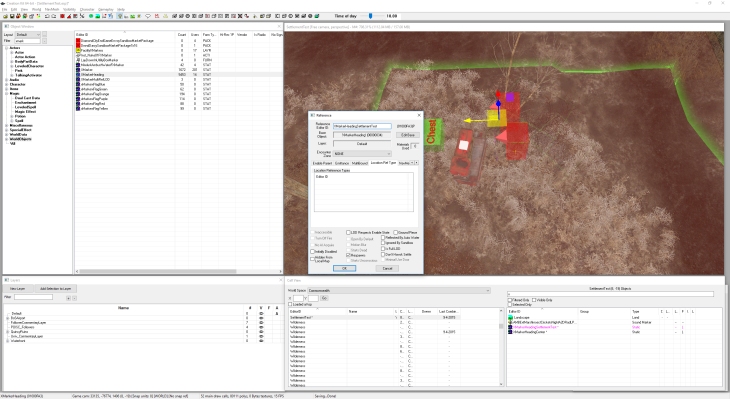
To start with, you need to place a DefaultEmptyTrigger in your chosen cell. This trigger is what defines the build space of your settlement. You can resize the trigger via Edit -> Primitives and changing the X, Y and Z bound coordinates.
Next, you will need to place your WorkshopWorkbench. This is the object you use to enter the settlement screen ingame. This is the object most of the other objects will link to in the rest of the tutorial.
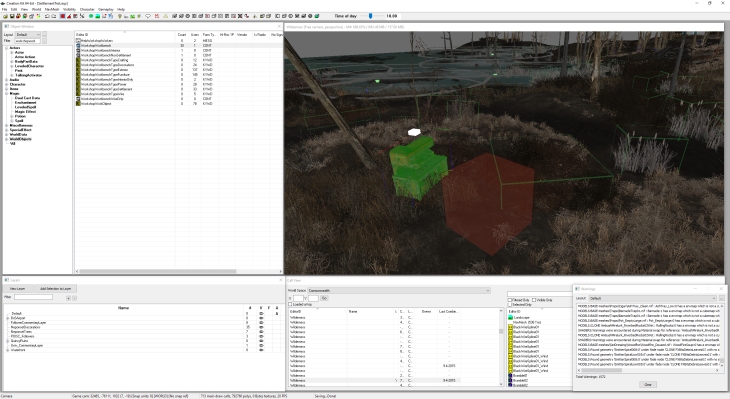
Now you want to link your DefaultEmptyTrigger to your WorkshopWorkbench. This tells the game that the settlement linked to this workbench should use the bounds set by the DefaultEmptyTrigger.
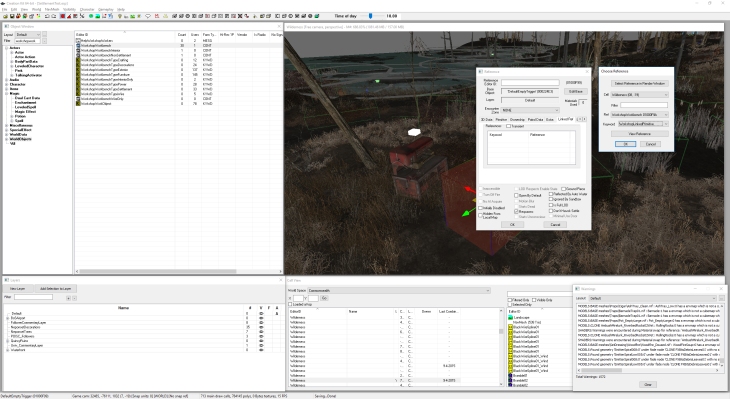
To do this, edit the DefaultEmpty Trigger, go to the Linked Ref tab and right-click, selecting New. Point the reference to your WorkshopWorkbench and select the keyword WorkshopLinkedPrimitive.
Adding the Border
You might be wondering how the game displays the settlement borders ingame? Well this is how. There is a .NIF model (Static) placed in the editor that displays these bounds.It should be called WorkshopBorderSETTLEMENTNAME, with SETTLEMENTNAME being the actual name of your settlement.
Unfortunately this means most of the models are shaped specifically to their respective settlements, and so won’t match your custom bounds. The only way to remedy this is to create your own. I have not done this for this tutorial, I’ve simply duplicated a model that looks similar to the bounds I created.
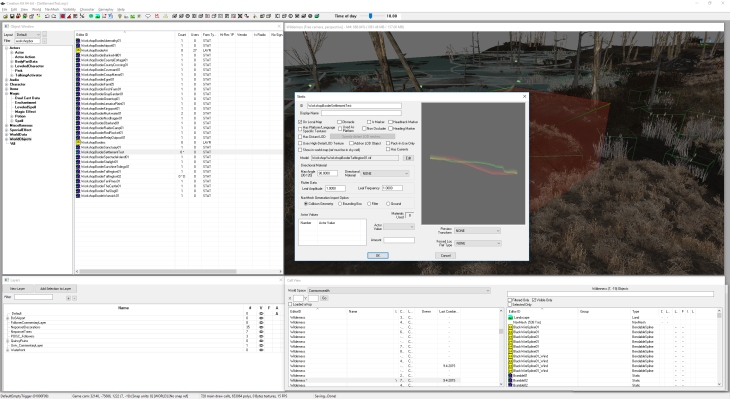
So once you have prepared your model (Static), simply drag it into your cell and position it so it looks correct. I have used by duplicated version of WorkshopBorderTaffingtonBoathouse, called WorkshopBorderSettlementTest.
Now you want to link the WorkshopBorderSettlementTest mode to your WorkshopWorkbench. This tells the game that this border model is linked to the settlement the workbench controls.
To do this, edit the WorkshopBorderSettlementTest, go to the Linked Ref tab and right-click, selecting New. Point the reference to your WorkshopWorkbench and select the keyword WorkshopLinkedBuildAreaEdge.
Adding the Resource Container
Filter the Object Window search with WorkshopResourceContainer and select the WorkshopResourceContainerSettlement container. Place it within your settlement.
Adding the Ownership Trigger
Next, filter the Object Window search with WorkshopSetOwnedTrigger and place the WorkshopSetOwnedTrigger activator within your settlement. This needs to be linked to the workbench.
To do this, edit the WorkshopSetOwnedTrigger, go to the Linked Ref tab and right-click, selecting New. Point the reference to your WorkshopWorkbench and select leave the keyword entry empty.
Size the trigger so it is slightly smaller than your DefaultEmptyTrigger.
Adding the Location Markers
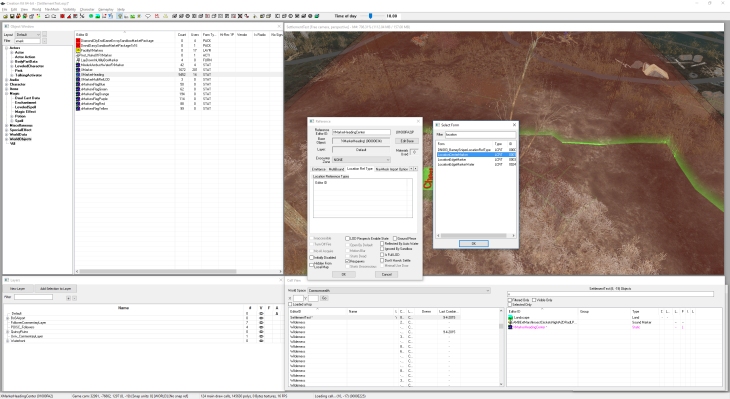
Now you need to place two location markers. Filter the Object Window search with XMarkerHeading. Drag a XMarkerHeading into your settlement and center it. Change the Editor ID for this object to XMarkerHeadingCenter.
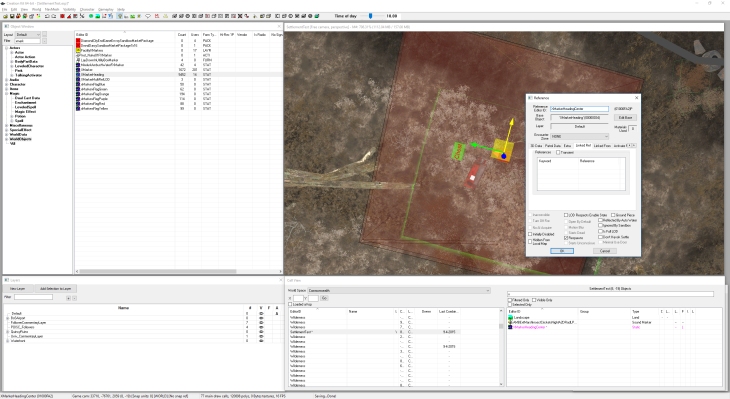
You need to add a Location Ref Type to this marker, so right-click, Edit and go to the Location Ref Type tab. Right-click and create a new entry, and select the LocationCenterMarker type.
Drag another XMarkerHeading into your settlement and change the Editor ID to XMarkerHeadingSettlementTest.
Adding the Map Marker
This marker will tell the game to add a travel marker for the settlement on the world map. Now you need to place two location markers. Filter the Object Window search with MapMarker.
Drag a MapMarker into your settlement. Under the Marker Data tab, change the type to Settlement and edit the name if you want.
Credits
Credit to BlahBlahDEEBlahBlah on the Nexus Forums for the original guide.
